Example Layouts Using Sector Switches
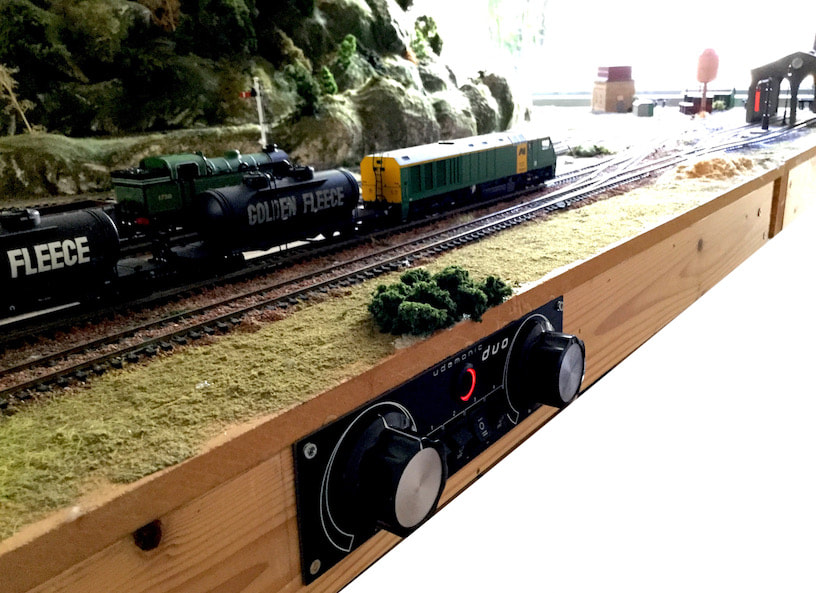
Duo mounted into layout baseboard
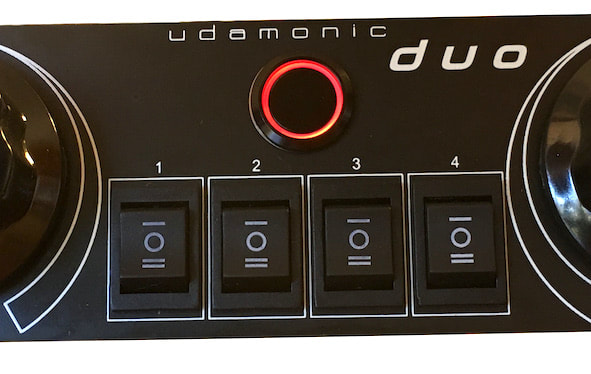
Duo Sector Switches
|
Your Duo controller has four sector control switches, that allow you to select which control is connected, or to isolate a given section.
The Duo has four outputs, corresponding to each of the front panel switches. The switches are labelled 1 to 4, corresponding to outputs 1 to 4 on the back of your Duo.
These outputs should be connected to sections of track that are isolated from each other. The switches can be used to connect a track section to control I, control II, or isolated (O). For Single and Momentum Controllers, Switch Banks (available separately) provide the same functionality. 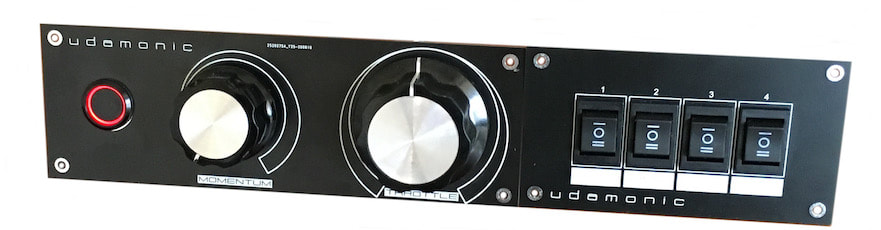
Momentum Controller with separate Switch Bank
|
Some example layouts showing how the four switch sections might be used operationally. In each case, sections of the layout (colour coded) are isolated from each other, and power is routed to them through the sector switches. This allows each section to be independently allocated to controller I or controller II. (The layout designs were drawn up using Rail Modeller Pro.)
Layout 1
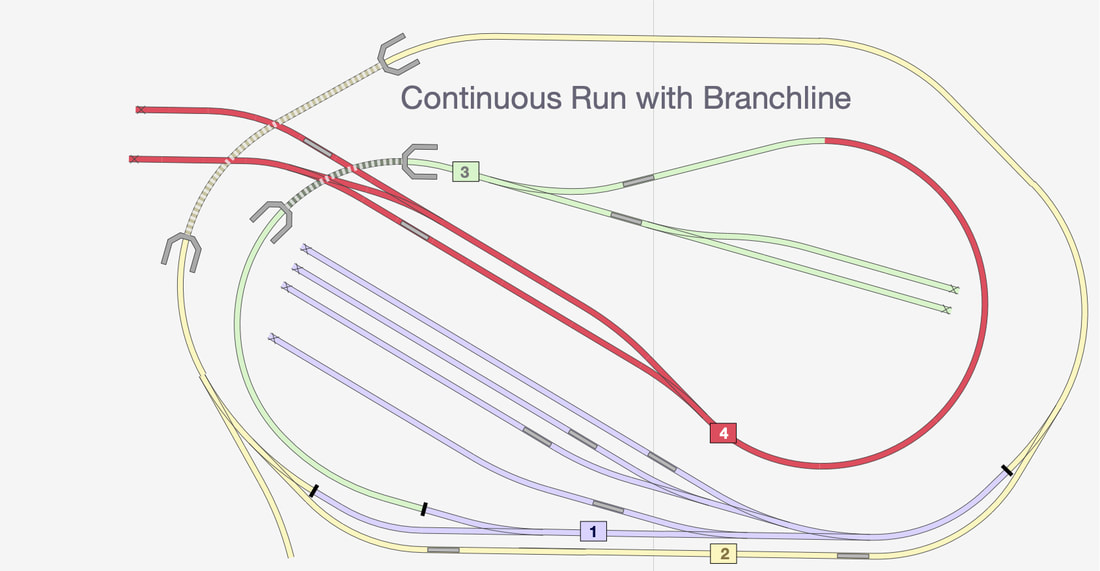
Track plan adapted from "The Virginian" by David Popp of Model Railroader Magazine
In Layout 1, the main line is controlled by switch 2. The yard is controlled by switch 1. This allows one engine to shunt the yard, while another train does laps around the layout. By setting switches 1 and 2 to be the same controller, a train can be driven from the main line into the loop, and reversed into the yard. Similarly, switch 3 controls the lower part of the branch, allowing an engine to shunt the industrial sidings (or perhaps a mine), while switch 4 controls the upper branch and terminus station.
Let's say we have a small freight train in the lower yard, ready to depart for the branch. We set switches 1 and 2 to be controller I. Using controller I, the train pulls out of the yard and does a lap on the main line, returning to the loop. We run the engine around the train. We set switch 3 and switch 4 to be controller I, and depart the loop travelling up the branch. Meanwhile, we can set switches 1 and 2 to controller II, and start another train onto the main line.
Layout 2

Layout 2 shows a simplified end-to-end layout. Each terminus is shown as just two sidings, but you can make them as complicated as you want. There are four sections, 1 through 4 from left to right, and each section can be allocated to one of two controls on your Duo, or a section can be isolated. It's assumed that the points/turnouts are isolating as well.
Let's say we have three trains: a green train at the left terminus, and a red and blue train at the right terminus. The blue train is destined for the bay platform at the intermediate station.
We set switches 1 and 2 to be controller I (aqua route), and switches 3 and 4 to be controller II (yellow route).

This allows us to drive the green train to the intermediate station at the same time as the blue train drives to the bay platform at the same station.
If we then set all switches to controller II (yellow route), we can drive the red train direct from the right terminus, through the intermediate station to the left terminus.
If we then set all switches to controller II (yellow route), we can drive the red train direct from the right terminus, through the intermediate station to the left terminus.


Then we set switches 2 and 4 to controller II, and drive the green train to the right terminus. Following on, we set switch 3 to also be controller II, and we drive the blue train to the right terminus.

Using one Duo controller, you can have continuous operation on an end-to-end layout.
Layout 3

Layout 3 is based on an example N-scale layout design at the Kato Hobby Center in Tokyo. It features a main line that transitions to a single track section (with passing loop) and back to a double track section. With appropriate signalling and a Duo controller, a lot of fun can be had having multiple trains working their way around the layout.
Layout 4

Layout 4 is Cyril Freezer's classic Minories design for a city terminus. Many people have built versions of Minories, and you can see one example here https://thrumlington.blogspot.com/2015/06/great-moor-street-minories.html. The above track plan is colour coded for use with a Duo and its four sector switches. Adding an additional Switch Bank would allow the layout to be broken up into even more sections.
Layout 5
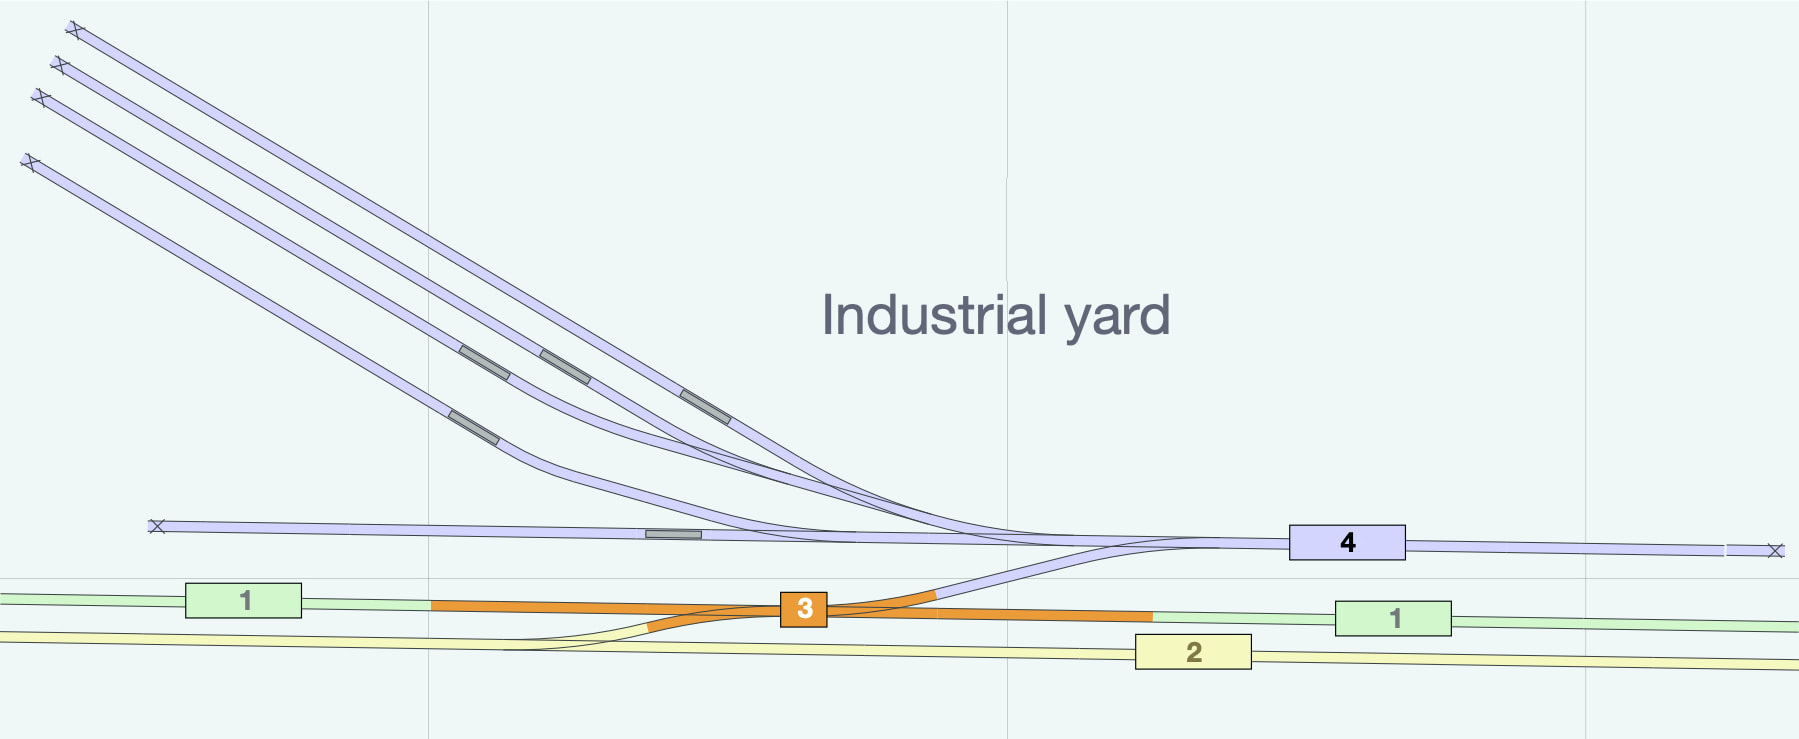
Layout 5 shows a two track main line, controlled by switches 1 and 2, and an industrial yard controlled by switch 4. Switch 3 is allocated to the crossover section. To drive a train from the yellow main line to the yard, set switches 2, 3 and 4 to be controller I, while controller II can run a train on the green main line.
Back to the User Guide.