udamonic.com
  • Start
    • What is a Scamp?
    • Getting Started
    • Getting Started (Windows)
  • Learn
    • What is Forth?
    • Arithmetic
    • The Stack
    • Creating Words
    • Compilation Tricks
    • Decompilation
    • Comments
    • Characters and Strings
    • Accessing Memory
    • Constants, Variables and Values
    • Flow Control
    • Loops
    • Data Structures
    • Doubles, Triples and Quads
    • FlashForth Dictionary Reference
    • Scamp Dictionary Reference
  • Extras
    • Interrupts
    • Timers
    • Multitasking
    • Delays and Tick Count
    • Processor Words
    • Starting up with turnkey
    • Changing the Prompt
    • Formatting Text on Screen
  • Interfacing
    • Using the LED Array
    • Temperature Sensor
    • Input/Output
    • Analog Input
    • Serial >
      • Serial Communication
      • Scamp Serial Comms
      • Scamp2 UART Pins
    • I2C >
      • I2C Overview
      • I2C Commands
    • SPI
    • PWM
    • Peripheral Pin Select
    • Input Capture
    • Digital Signal Modulator
    • DataFlash
    • RS485
  • Create
    • Scamp Projects on Youtube
    • Prototyping >
      • Protoboards
      • Fabricating PCBs
      • Soldering
    • GPIO >
      • Adding Extra GPIO
      • 32-bit GPIO Module
      • Adding a Low Side Switch
    • Sensing >
      • Measuring Temperature
    • LEDs >
      • Adding LEDs
      • LED arc-welder effect
    • Memory >
      • Adding MRAM
      • AT24C256 EPROM Driver
    • Displays >
      • Adding a 7 Segment Display
      • Adding a Touch LCD
      • Touch LCD GUI
      • Game of Pong
    • FizzBuzz
    • Model Train Control
    • Adding a Real Time Clock
    • 1-D Pacman
  • Resources
  • Buy
  • Consulting
  • About

Interfacing
​

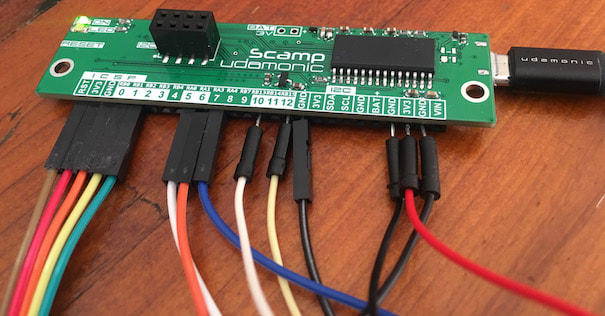
You can connect your Scamp using dupont wires directly connected to the I/O connector:
Picture
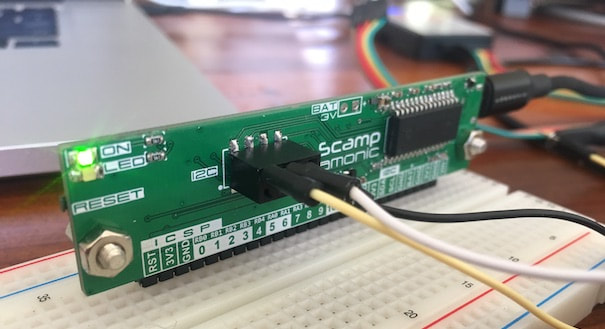
Or, with a pin header, your Scamp can be inserted into a breadboard or mounted onto a custom PCB:
Picture

Learn how to use simple digital I/O, sample analog inputs, interface to serial communication devices, add peripherals using I2C, and using PWM to control motors or generate analog signals.
On a Scamp1/Scamp2 the following pins can used with the following functions:
PinInputOutputSerial
0 Analog Input Switch Output PWM Rx Tx
1 Analog Input Switch Output PWM Rx Tx
2 Analog Input Switch Output PWM Rx Tx
3 Analog Input Switch Output PWM Rx Tx
4 Input * Rx
5 Analog Input Switch Output PWM Rx Tx
6 Analog Input Switch Output PWM Rx Tx
7 Input Switch Output
8 Input
9 Input Switch Output PWM Rx Tx
10 Analog Input Switch Output PWM Rx Tx
11 Analog Input Output PWM Rx Tx
12 Input Switch Output PWM Rx Tx

​​* 5V tolerant input

Learn : Interfacing
Site powered by Weebly. Managed by Hostwinds
  • Start
    • What is a Scamp?
    • Getting Started
    • Getting Started (Windows)
  • Learn
    • What is Forth?
    • Arithmetic
    • The Stack
    • Creating Words
    • Compilation Tricks
    • Decompilation
    • Comments
    • Characters and Strings
    • Accessing Memory
    • Constants, Variables and Values
    • Flow Control
    • Loops
    • Data Structures
    • Doubles, Triples and Quads
    • FlashForth Dictionary Reference
    • Scamp Dictionary Reference
  • Extras
    • Interrupts
    • Timers
    • Multitasking
    • Delays and Tick Count
    • Processor Words
    • Starting up with turnkey
    • Changing the Prompt
    • Formatting Text on Screen
  • Interfacing
    • Using the LED Array
    • Temperature Sensor
    • Input/Output
    • Analog Input
    • Serial >
      • Serial Communication
      • Scamp Serial Comms
      • Scamp2 UART Pins
    • I2C >
      • I2C Overview
      • I2C Commands
    • SPI
    • PWM
    • Peripheral Pin Select
    • Input Capture
    • Digital Signal Modulator
    • DataFlash
    • RS485
  • Create
    • Scamp Projects on Youtube
    • Prototyping >
      • Protoboards
      • Fabricating PCBs
      • Soldering
    • GPIO >
      • Adding Extra GPIO
      • 32-bit GPIO Module
      • Adding a Low Side Switch
    • Sensing >
      • Measuring Temperature
    • LEDs >
      • Adding LEDs
      • LED arc-welder effect
    • Memory >
      • Adding MRAM
      • AT24C256 EPROM Driver
    • Displays >
      • Adding a 7 Segment Display
      • Adding a Touch LCD
      • Touch LCD GUI
      • Game of Pong
    • FizzBuzz
    • Model Train Control
    • Adding a Real Time Clock
    • 1-D Pacman
  • Resources
  • Buy
  • Consulting
  • About